Expectations for a Chemically-Accelerated Super-finishing Process – Part 3/3
By : Lane Winkelmann ,

By : Lane Winkelmann ,
Expectations for a chemically accelerated superfinishing process
When selecting your chemically accelerated superfinishing process, it is important to understand and specify your desired deliverables. In this series, we will explain two different final surface conditions that can be produced as well as a recent case study where potential surface problems were uncovered and addressed by the proper application of isotropic superfinishing.
Third in a series
Thank you for returning for our third and final article in this series. In the previous articles, we discussed the fact that chemically accelerated/assisted superfinishing, also known as isotropic superfinishing, was introduced into the gear industry more than twenty years ago. Since that time, it has become widely accepted as a solution for numerous gear failure modes and performance enhancements. However, as a technology becomes more ingrained in an industry, the newness wears off and it becomes more like a commodity product. As this happens, engineering drawings become more generic, as they start to incorporate low surface roughness callouts with little other guidance. Buyers start shopping for the lowest cost solution and fastest delivery without understanding that, perhaps, the technology is still evolving and improving, or that not all processes and suppliers will produce the same results.
Along these lines discussed above, the Gear Research Institute (GRI) located at Penn State University reached out for assistance reviewing test gears that had been isotropically superfinished to remove surface damage resulting from shot peening of the tooth flanks. These gears were destined for use to evaluate several coating applications through fatigue testing.
Upon receipt at GRI, the subject gears appeared to meet the surface finish requirements, but they retained the black/dark conversion coating inherent to the material removal portion of the refinement process, as shown in Figure 1.
The GRI team recognized the difference in tooth flank appearance which is typically a mirror-like surface finish resulting from isotropic superfinishing processing. GRI’s main concern was that the test coatings may not properly adhere, thus ruining the performance testing of the expensive gears. These gears had not been processed by REM, but REM has been a member of the GRI Aerospace Bloc for many years and is recognized as an expert in the field of gear surface enhancement and isotropic superfinishing, so GRI reached out to have us evaluate these gears.
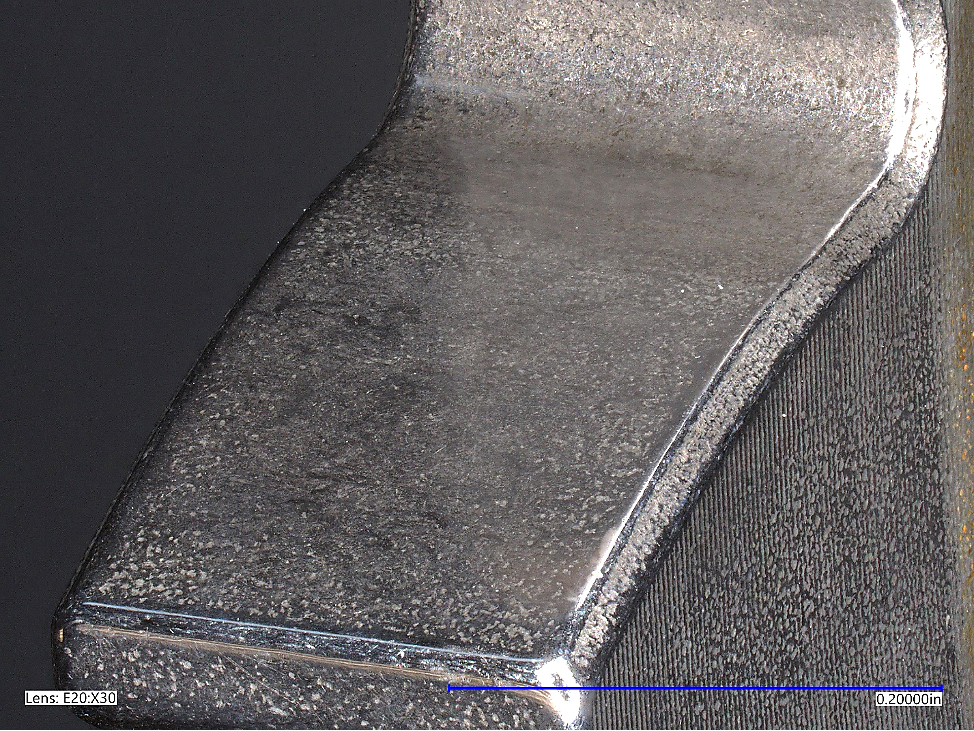
Upon receipt of the gears, REM was able to visually confirm that the gears had been improperly or incompletely burnished and that the conversion coating had not been removed from the tooth flanks. In the 30x magnification image shown in Figure 2, the surface looks nicely finished and the light swirl/scratch patterns in the conversion coating created by the media during the refinement/material removal process can be seen. After a discussion with GRI and their customer, REM agreed to burnish the parts to the mirror-like appearance GRI is accustomed to receiving (this processing step is described in our prior article).
After burnishing, the surface that appeared refined when covered with the black conversion coating revealed a very different surface finish. The tooth surface that appeared smooth and uniform was rough and textured. It became very clear that the conversion coating was masking the true surface that still exhibited a substantial amount of the shot-peen texture. The digital microscope image in Figure 3, taken again at 30x, clearly shows not only that the peening dimples remain, but that the finishing process did not remove material uniformly across the tooth flank.

Figure 3: 30x image of tooth flank revealing hidden shot peen dimples after burnish step to remove the conversion coating.
After discussions with GRI and their customer, it was determined that the best course of action would be for REM to rework the gears in an attempt to uniformly remove the residual peening texture. Due to the non-uniformity of finish across the tooth flank, several parts were inspected to ensure the profiles met the design tolerances and to get an idea of how much surface material could be safely removed during the rework processing. It was discovered that both gears had excess material at the root, but generally met the tolerances in all other areas while approaching the lower limits. The excess material in the root is indicative of improper media sizing for the tooth pitch. Incorrectly sized media likely inhibited its ability to contact this area during the original superfinishing process. Using this profile data, a rework process plan was implemented to minimize the material removal in an attempt to maintain the gear’s tolerances, while still removing the residual peening texture located within the active profile.
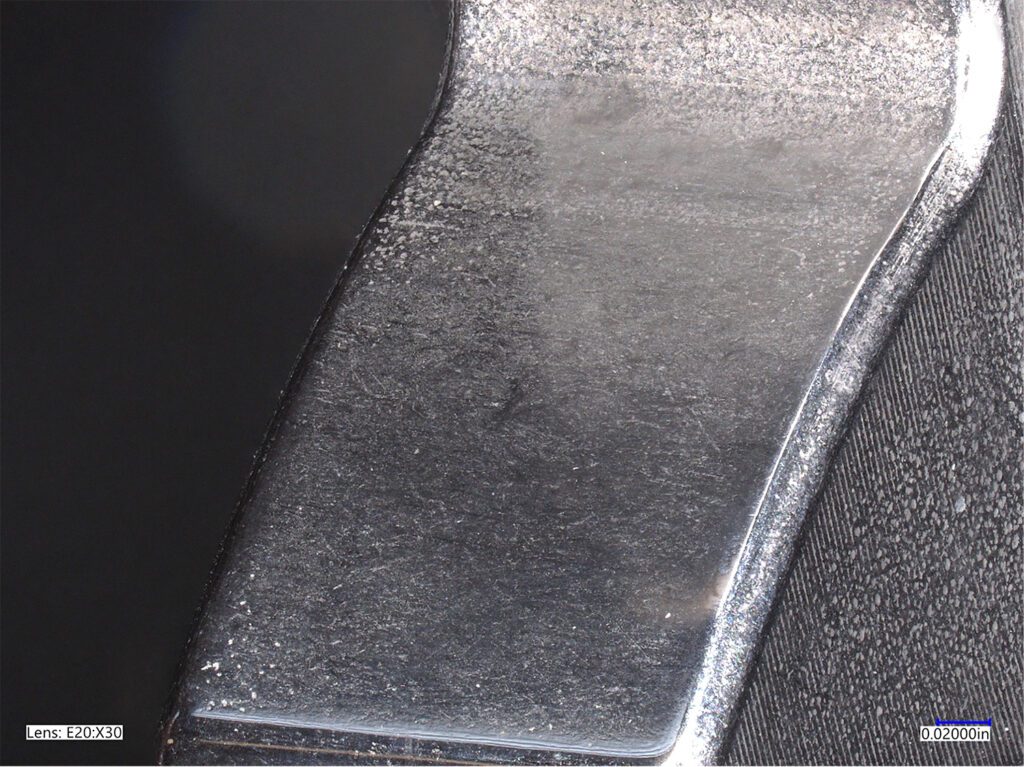
All test gears were processed together as one lot with a short refinement and burnish cycle that targeted a material removal of approximately 0.0002” (5 µm) per tooth flank. When completed, a full round of inspections was conducted. This short cycle improved the surface finish, but did not fully remove all the residual shot peening texture, as can be seen in Figure 4.

Figure 4: 30x image of tooth flank revealing hidden shot peen dimples after burnish step to remove the conversion coating.
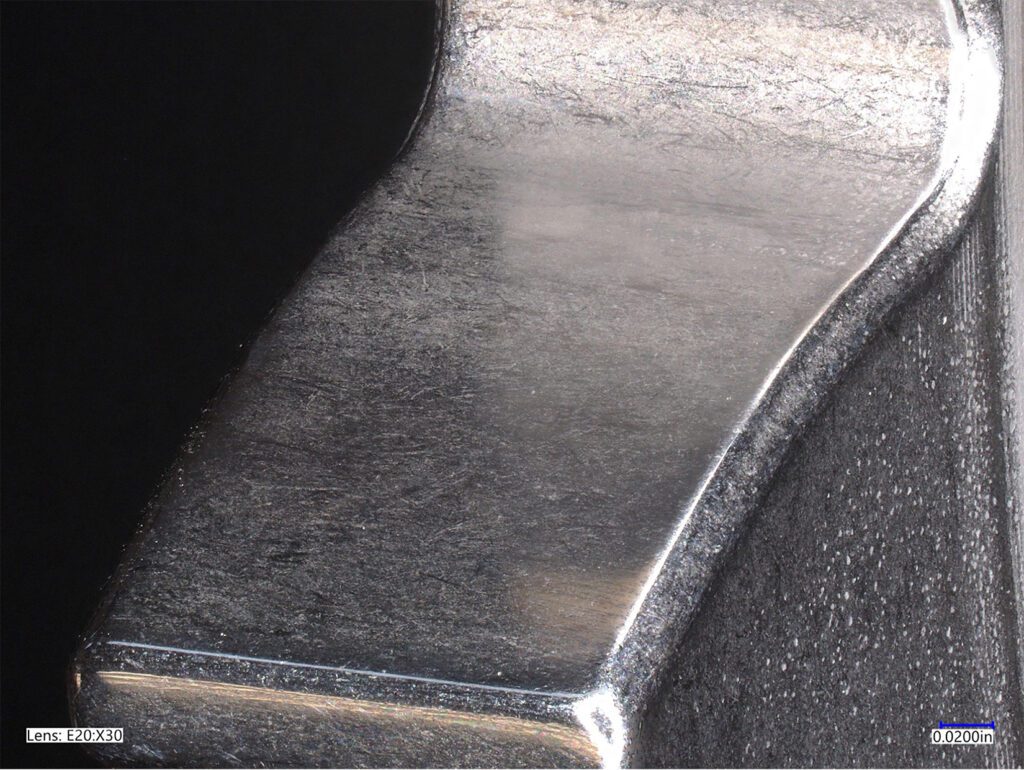
As a result, a second short cycle targeting the same amount of material removal was conducted. The total targeted material removal of both rework cycles combined was approximately 0.0004” (10µm) per tooth flank. Final visual inspection indicated the flanks now met the peening texture-free condition within the active profile desired by the customer. Figure 5 shows the final condition after both rework cycles and without any residual conversion coating. The part now appears mirror-like and reflective, as most anticipate from an isotropic superfinish process. Surface roughness measurements at the originally problematic areas were now all consistently Ra ~ 2 µin. (0.05µm).,

Figure 5: 30x magnification showing complete peening dimples removal after the second short rework cycle.
Ultimately, GRI received the isotropic superfinished gears they originally set out to procure for their coating project, but at the cost of a severely delayed timeline. Thankfully, GRI is at the cutting edge of gear development and is extremely familiar with superfinishing processes and the results expected. The GRI team quickly identified that the test gears received from their original supplier did not visually meet their expectations, and they reached out for a second opinion from REM. The original isotropic superfinishing supplier made several key errors in their processing, any of which could have resulted in not only the failure of the project, but also the propagation of potentially incorrect data relative to the coating testing.
As with all manufacturing processes, it is important to know what process parameters are critical to final part quality. As we have seen in this series of articles, when selecting an isotropic superfinishing supplier or implementing an isotropic superfinishing process in-house, it is key to ensure that the applied refinement processing time and associated material removal are adequate to generate the desired final surface finish quality. It is also critical to ensure that the processing media selection will allow for uniform material removal across the entire tooth flank to avoid problematic tooth form modifications. We hope this series of articles helps you to better understand and specify the desired deliverables when selecting your chemically accelerated superfinishing process, and that you can fully capture the benefits of this surface improvement technology.
Malcolm Maxey is a process engineer who works in the Research and Development Group with more than 20 years of engineering and account management experience in the automotive, petrochemical, and telecommunications fields. As a process engineer, Maxey verifies and develops work procedures for isotropic surface finishing processes. In addition, he is responsible for the procurement management of raw materials required for process-aid manufacturing. Maxey has a B.S. in mechanical engineering from Prairie View A&M University, Prairie View, Texas.
Lane Winkelmann joined REM Surface Engineering in 1996 where he has held multiple positions including director of services where he managed three ISF® Service Centers covering the U.S. and European markets. He is currently the director of research and development. During his career, Winkelmann has developed numerous products and processes, and he has co-authored several patents and papers on the use of superfinishing. He received a B.S. from Texas A&M University in 1991 and his MBA from Tulane University in 2005.
Please fill out the information below to receive the selected resource.
Please fill out the information below to receive the selected resource.